Thursday, December 24, 2020

Create Docker Image with Simple .NET Core MVC Web App and Upload to AWS Elastic Container Registry

Even though there is enough material available on this topic, still it could take 1-2 days a beginner to upload their first .Net web application docker image to AWS ECR. This post lists the steps without going into details.

I used Visual Studio 2019 to create a new project ASP.NET Core Web Application.


Give a Project name in the next screen and create an MVC project. Make sure to select ‘Docker support’ check box.


Selecting ‘Docker support’ option will automatically generate a Dockerfile in the solution. 


Additionally, .dockerignore file will also get generated one level up in the project location, which will use to make the build context as small as possible by ignoring unwanted files.


To build and run a Docker Image from above solution in a Windows PC, we can use Windows PowerShell. First go to the project folder and move the Dockerfile one level up to the folder where solution file and dockerignore file resides. Otherwise when you are building the docker image, an error message will appear if Docker file reside at the same level of .csproj file.


Now, open a PowerShell window and navigate to your project folder. Then use the following command to build the Docker image. CCISWebApp is the project name.

docker build -t cciswebapp .

This command will take some time to execute. It will download the base images if they are not present locally. Once command is successful, use following command to see the Docker images and your Docker image should be listed.

docker images

To run the Docker image, use the following command.

docker run -d -p 8081:80 --name myapp cciswebapp

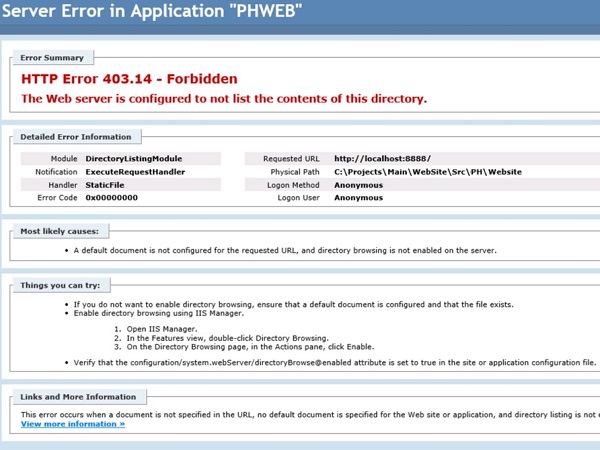
Now you can go to localhost:8081 to access your app in a web browser. To upload this Docker image to AWS Elastic Container Registry (or ECR), we have to first install AWS CLI. Go to the https://aws.amazon.com/cli/, download and run the 64-bit Windows installer.

Open a new PowerShell window and use following command to configure AWS Command Line Interface. Old PowerShell window won’t recognize below command.

aws configure

You will need AWS Access Key ID and AWS Secret Access Key to complete the command. To get them, go to AWS Console -> IAM -> Users

Then select your user account and go to the ‘Security Credentials’ tab in the Summary page. Use ‘Create access key’ button to generate keys and complete aws configure command.


Then go to the AWS Console -> Elastic Container Registry and create a Repository for your images. Copy the Repository URI. 


Then use following command in PowerShell to tag your Docker image. First argument is current image name and second argument is repository URI.

docker tag cciswebapp 6xxxxxxxxxx9.dkr.ecr.us-east-2.amazonaws.com/ccis-web-app

Now, to use Docker CLI to push the image to the repository, first need to authenticate to the ECR registry. This can be done with following command. Make sure to use correct region and account number in the command.

aws ecr get-login-password --region us-east-2 | docker login --username AWS --password-stdin 6xxxxxxxxxx9.dkr.ecr.us-east-2.amazonaws.com

Then use following command to push the image. Again, make sure to use correct region and account number in the command.

docker push 6xxxxxxxxxx9.dkr.ecr.us-east-2.amazonaws.com/ccis-web-app

If the command is successful, image will be uploaded to the repository.


Thursday, December 13, 2018

ASP .NET MVC Application - HTTP Error 403.14 – Forbidden

Here are few reasons to get “HTTP Error 403.14 - Forbidden The Web server is configured to not list the contents of this directory.” error in ASP .NET Web application.


1. ASP.NET not registered on the server. To fix it, execute following command in command prompt:
Windows 32bit
%windir%\Microsoft.NET\Framework\v4.0.30319\aspnet_regiis.exe -ir

Windows 64bit
%windir%\Microsoft.NET\Framework64\v4.0.30319\aspnet_regiis.exe -ir

2. Wrong .NET version (v2.0 instead of v4.0) is configured on the web site application pool. To fix it, find the Application Pool of the website, go to Advanced Settings and make sure that the .NET Framework version value v4.0 is selected.

3. Wrong IIS directory permissions. To fix it, make sure App Pool user has enough permission to the website directory.

Also make sure connection strings in the web.config are correct and there is no missing DLLs in the bin folder.

Wednesday, April 11, 2018

SharePoint Online - Make Office File to Open in Desktop Application by default Instead of Online

In a SharePoint documents library, documents will be opened in client application by default, if the “Open Documents in Client Applications by Default site” site collection feature is activated.


However, if you use document URL as a link in another place, clicking the link will not open document in desktop application. It will open the document in online app.

Solution for that is, add respective Office URI Scheme to the beginning of the document URL. For a Excel document, link should be like: ms-excel:ofe|u|https://abc.sharepoint.com………
List of URL scheme names available for Microsoft Office applications are:
  • ms-word:
  • ms-powerpoint:
  • ms-excel:
  • ms-visio:
  • ms-access:
  • ms-project:
  • ms-publisher:
  • ms-spd:
  • ms-infopath:

Sample jQuery code to open an Excel document in desktop application on a button click is:
$("#btnOpenExcelFile" ).click (function() {
window.open( "ms-excel:ofe|u|https://abc.sharepoint.com/:x:/r/sites/BD/Shared%20Documents/Submissions%20List%20(Excel).xlsx?d=wda689ae3bb824932b2fd607a7870b107&csf=1&e=xTBvDI");
});


Friday, January 12, 2018

SharePoint Online - Client Side People Picker – JavaScript

Following code sample is an example of how to use People Picker controls in a SharePoint online custom form. Just add a Script Editor webpart to a page and add following code. Hitting ‘Test on Console’ button will log selected people’s names in the browser console.

In addition to name, there are other properties that you can directly use as shown in the following image.


Complete code to place in the Script Editor webpart:

< script src="https://ajax.googleapis.com/ajax/libs/jquery/1.11.2/jquery.min.js"></script>
< script src ="/_layouts/15/SP.Runtime.js"></script>
< script src ="/_layouts/15/sp.js"></script>
< script src ="/_layouts/15/1033/strings.js"></script>
< script src ="/_layouts/15/clienttemplates.js"></script>
< script src ="/_layouts/15/clientforms.js"></script>
< script src ="/_layouts/15/clientpeoplepicker.js"></script>
< script src ="/_layouts/15/autofill.js"></script>
< script src ="/_layouts/15/SP.Core.js"></script>
 
< div >
  <p><span>On behalfof:</span></p>
  <divid="peoplePickerDivOnBehalfOf"></div>
  <p><span>ApproverName:</span></p>
  <divid="peoplePickerDivApprover"></div>
 
  <inputtype="button"value="Test in Console" onclick =" ViewFieldData ( )"/>
</div>
 
<scripttype ="text/javascript">
$(document).ready( function() {
 
// Initialize People Pickers after loading clientpeoplepicker.js file.
SP.SOD.executeFunc( "/_layouts/15/clientpeoplepicker.js","SP.ClientContext",function() {
setTimeout( function() {
initializePeoplePicker( 'peoplePickerDivApprover');
initializePeoplePicker( 'peoplePickerDivOnBehalfOf');
}, 2000);
});
});
 
  // Render and initialize the client-side People Picker.
  function initializePeoplePicker(peoplePickerElementId) {
// Create a schema to store picker properties, and set the properties.
   var schema = {};
schema[ 'PrincipalAccountType'] ='User,DL,SecGroup,SPGroup';
 
// To specifies where you would want to search for the valid values
schema[ 'SearchPrincipalSource'] = 15;
 
// To specifies where you would want to resolve for the valid values
schema[ 'ResolvePrincipalSource'] = 15;
schema[ 'AllowMultipleValues'] =true;
schema[ 'MaximumEntitySuggestions'] = 50;
schema[ 'Width'] ='280px';
// Render and initialize the picker.
// Pass the ID of the DOM element that contains the picker, an array of initial PickerEntity
// objects to set the picker value, and a schema that defines picker properties.
this .SPClientPeoplePicker_InitStandaloneControlWrapper(peoplePickerElementId, null, schema);
  }
 
  function ViewFieldData() {
var peoplePickerApprover=this.SPClientPeoplePicker.SPClientPeoplePickerDict.peoplePickerDivApprover_TopSpan;
var peoplePickerOnBehalfOf=this.SPClientPeoplePicker.SPClientPeoplePickerDict.peoplePickerDivOnBehalfOf_TopSpan
//var keysApprover = peoplePickerApprover.GetAllUserKeys();
//var keysOnBehalfOf = peoplePickerOnBehalfOf.GetAllUserKeys();
 
// Read the first person selected
var userApproverText='';
var userApprover = peoplePickerApprover.GetAllUserInfo();
if (userApprover.length > 0) {
var userA=userApprover[0];
 
// Read DisplayText property. There are few other properties available too
userApproverText = userA.DisplayText;
}
 
// Read all people selected
var userOnBehalfOfText='';
var userOnBehalfOf = peoplePickerOnBehalfOf.GetAllUserInfo();
if (userOnBehalfOf.length > 0) {
for ( var i = 0; i < userOnBehalfOf.length; i++) {
var userB = userOnBehalfOf[i];
 
if (i == 0) {
userOnBehalfOfText += userB.DisplayText;
} else{
userOnBehalfOfText += ( '; '+userB.DisplayText);
}
}
}
 
console.log( "Approver: "+userApproverText);
console.log( "On behalf of: "+userOnBehalfOfText);
  }
</script>

Wednesday, October 11, 2017

SQL Server – Script to Rebuild / Reorganize Indexes based on Fragmentation and No of Pages

Heavily fragmented indexes can degrade query performance and cause applications to respond slowly. Reorganizing or rebuilding of indexes will fix this issue. However, this is a very resource intensive process. Therefore identify and only rebuild the indexes that need to be rebuilt is important.

Following criteria can be used to determine which indexes to rebuild, which indexes to reorganize, and which indexes to leave alone.
  • REBUILD index : if fragmentation is > 30% and number of pages > 1000
  • REORGANIZE index : if fragmentation is > 10 % but < 30% and number of pages > 1000

We can use system function sys.dm_db_index_physical_stats to find out fragmentation information of indexes like:
  • avg_fragmentation_in_percent: The percent of logical fragmentation (out-of-order pages in the index).
  • fragment_count: The number of fragments (physically consecutive leaf pages) in the index.
  • avg_fragment_size_in_pages: Average number of pages in one fragment in an index.

Following is a complete SQL script copied from http://www.sqlmusings.com/2009/03/15/a-more-effective-selective-index-rebuildreorganize-strategy/ for the above purpose. Setting “report_only = 1” of the script will only analyze the database without updating.

-- Ensure a USE <databasename> statement has been executed first.
SET NOCOUNT ON

-- adapted from "Rebuild or reorganize indexes (with configuration)" from MSDN Books Online
-- (http://msdn.microsoft.com/en-us/library/ms188917.aspx)

-- =======================================================
-- || Configuration variables:
-- || - 10 is an arbitrary decision point at which to reorganize indexes.
-- || - 30 is an arbitrary decision point at which to
-- || switch from reorganizing, to rebuilding.
-- || - 0 is the default fill factor. Set this to a
-- || a value from 1 to 99, if needed.
-- =======================================================
DECLARE @reorg_frag_thresh   float       SET @reorg_frag_thresh   = 10.0
DECLARE @rebuild_frag_thresh float       SET @rebuild_frag_thresh = 30.0
DECLARE @fill_factor         tinyint     SET @fill_factor         = 80
DECLARE @report_only         bit         SET @report_only         = 1

-- added (DS) : page_count_thresh is used to check how many pages the current table uses
DECLARE @page_count_thresh smallint     SET @page_count_thresh   = 1000

-- Variables required for processing.
DECLARE @objectid       int
DECLARE @indexid        int
DECLARE @partitioncount bigint
DECLARE @schemaname     nvarchar(130)
DECLARE @objectname     nvarchar(130)
DECLARE @indexname      nvarchar(130)
DECLARE @partitionnum   bigint
DECLARE @partitions     bigint
DECLARE @frag           float
DECLARE @page_count     int
DECLARE @command        nvarchar(4000)
DECLARE @intentions     nvarchar(4000)
DECLARE @table_var      TABLE(
                          objectid     int,
                          indexid      int,
                          partitionnum int,
                          frag         float,
                          page_count   int
                        )

-- Conditionally select tables and indexes from the
-- sys.dm_db_index_physical_stats function and
-- convert object and index IDs to names.
INSERT INTO
    @table_var
SELECT
    [object_id]                    AS objectid,
    [index_id]                     AS indexid,
    [partition_number]             AS partitionnum,
    [avg_fragmentation_in_percent] AS frag,
       [page_count]                         AS page_count
FROM
    sys.dm_db_index_physical_stats (DB_ID(), NULL, NULL , NULL, 'LIMITED')
WHERE
    [avg_fragmentation_in_percent] > @reorg_frag_thresh
       AND
       page_count > @page_count_thresh
       AND
    index_id > 0
      

-- Declare the cursor for the list of partitions to be processed.
DECLARE partitions CURSOR FOR
    SELECT * FROM @table_var

-- Open the cursor.
OPEN partitions

-- Loop through the partitions.
WHILE (1=1) BEGIN
    FETCH NEXT
        FROM partitions
        INTO @objectid, @indexid, @partitionnum, @frag, @page_count

    IF @@FETCH_STATUS < 0 BREAK

    SELECT
        @objectname = QUOTENAME(o.[name]),
        @schemaname = QUOTENAME(s.[name])
    FROM
        sys.objects AS o WITH (NOLOCK)
        JOIN sys.schemas as s WITH (NOLOCK)
        ON s.[schema_id] = o.[schema_id]
    WHERE
        o.[object_id] = @objectid

    SELECT
        @indexname = QUOTENAME([name])
    FROM
        sys.indexes WITH (NOLOCK)
    WHERE
        [object_id] = @objectid AND
        [index_id] = @indexid

    SELECT
        @partitioncount = count (*)
    FROM
        sys.partitions WITH (NOLOCK)
    WHERE
        [object_id] = @objectid AND
        [index_id] = @indexid

    -- Build the required statement dynamically based on options and index stats.
    SET @intentions =
        @schemaname + N'.' +
        @objectname + N'.' +
        @indexname + N':' + CHAR(13) + CHAR(10)
    SET @intentions =
        REPLACE(SPACE(LEN(@intentions)), ' ', '=') + CHAR(13) + CHAR(10) +
        @intentions
    SET @intentions = @intentions +
        N' FRAGMENTATION: ' + CAST(@frag AS nvarchar) + N'%' + CHAR(13) + CHAR(10) +
        N' PAGE COUNT: '    + CAST(@page_count AS nvarchar) + CHAR(13) + CHAR(10)

    IF @frag < @rebuild_frag_thresh BEGIN
        SET @intentions = @intentions +
            N' OPERATION: REORGANIZE' + CHAR(13) + CHAR(10)
        SET @command =
            N'ALTER INDEX ' + @indexname +
            N' ON ' + @schemaname + N'.' + @objectname +
            N' REORGANIZE; ' +
            N' UPDATE STATISTICS ' + @schemaname + N'.' + @objectname +
            N' ' + @indexname + ';'

    END
    IF @frag >= @rebuild_frag_thresh BEGIN
        SET @intentions = @intentions +
            N' OPERATION: REBUILD' + CHAR(13) + CHAR(10)
        SET @command =
            N'ALTER INDEX ' + @indexname +
            N' ON ' + @schemaname + N'.' +     @objectname +
            N' REBUILD'
    END
    IF @partitioncount > 1 BEGIN
        SET @intentions = @intentions +
            N' PARTITION: ' + CAST(@partitionnum AS nvarchar(10)) + CHAR(13) + CHAR(10)
        SET @command = @command +
            N' PARTITION=' + CAST(@partitionnum AS nvarchar(10))
    END
    IF @frag >= @rebuild_frag_thresh AND @fill_factor > 0 AND @fill_factor < 100 BEGIN
        SET @intentions = @intentions +
            N' FILL FACTOR: ' + CAST(@fill_factor AS nvarchar) + CHAR(13) + CHAR(10)
        SET @command = @command +
            N' WITH (FILLFACTOR = ' + CAST(@fill_factor AS nvarchar) + ')'
    END

    -- Execute determined operation, or report intentions
    IF @report_only = 0 BEGIN
        SET @intentions = @intentions + N' EXECUTING: ' + @command
        PRINT @intentions     
        EXEC (@command)
    END ELSE BEGIN
        PRINT @intentions
    END
       PRINT @command

END

-- Close and deallocate the cursor.
CLOSE partitions
DEALLOCATE partitions

GO

Rebuilding an index can be executed online or offline. Reorganizing an index is always executed online: https://docs.microsoft.com/en-us/sql/relational-databases/indexes/reorganize-and-rebuild-indexes