If you are using the out of the box SharePoint blog
site and you want to customize the layout of the blog posts, this is how you do
it. This requires you to create a new
XSL template file and then connect that file to the blog post.
This example shows how we remove “By” section of the
blog post shown in the figure below.

1. Locate the blog.xsl file on your SharePoint server.
It is located in:
C:\Program Files\Common Files\Microsoft
Shared\Web Server Extensions\14\TEMPLATE\LAYOUTS\XSL
2. Get a copy of it and rename the copy. (Ex: CustomBlog.xsl).
Make sure CustomBlog.xsl is saved in the same directory as blog.xsl.
3. Modify CustomBlog.xsl. You have to find respective
statement for the by line and remove it. The statement of my file was:
<xsl:when test="@Name='Author'">
<span class="ms-postfootercolor">
<xsl:value-of select="$thisNode/../@resource.wss.ByPrefix"/>
span>
<xsl:text disable-output-escaping="yes" ddwrt:nbsp-preserve="yes"> xsl:text>
<xsl:value-of select="$thisNode/@Author.span" disable-output-escaping="yes" />
xsl:when>
4. Go to the Blog home page (http://blog >/default.aspx ), then Site Actions –> Edit Page.
Select
Edit Web Part option of the Posts Web Part.

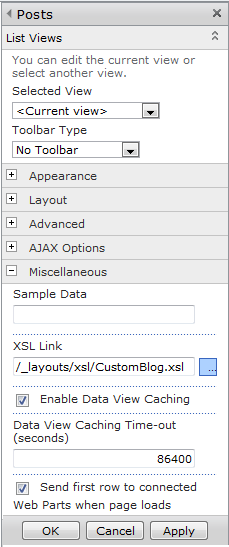
5. Expand “Miscellaneous” section of the edit web part properties
window. Specify “/_layouts/xsl/CustomBlog.xsl” as the XSL Link. Save properties.
6. Save changes and refresh the page. You will find “by”
section is removed from the blog post as shown in the below figure.
